Keycloak is an Identity and Access Management Server for Modern Applications and Services. In this Keycloak tutorial we will learn how to set up Keycloak and configure it to authenticate/authorize Enterprise applications.
Keycloak update (2023)
Keycloak is available in two distributions:
- Legacy distribution (which uses WildFly as runtime engine).
- Quarkus distribution (which uses Quarkus as runtime engine). To learn more about managing Keycloak with Quarkus, we recommend checking also this article: Getting started with Keycloak powered by Quarkus
First of all, download the latest stable build of Keycloak from http://keycloak.jboss.org/keycloak/downloads
Then, unzip the distribution in a folder of your drive. In the next section, we will start and configure a Keycloak Realm.
Starting Keycloak
Firstly, we will start Keycloak with an offset of 100 in order to avoid conflicts with existing services running on port 8080 (for example WildFly server). Depending on your Keycloak distribution, you can start it as follows:
1)Keycloak legacy distribution
$ ./standalone.sh -Djboss.socket.binding.port-offset=100
2)Keycloak Quarkus distribution
./kc.sh start-dev --http-port=8180
Next, log into Keycloak Administration Console, available at: http://localhost:8180
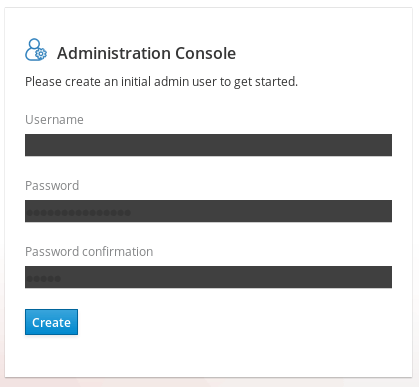
In your first Login, you will be requested to create an administration user:
Next, login with the admin user you have just created:

What is Keycloak default admin password?
Keycloak does not have a default password for the admin account. As said, when you first create an instance of Keycloak, you will need to set an initial password for the admin account. It is important to set a strong, unique password for the admin account to secure your Keycloak server. To learn how to reset the Admin Password for the default H2 Database, check this article: How to access Keycloak H2 Database
Create your Realm, Roles, Users and a Client
The core concept in Keycloak is a Realm. A realm secures and manages security metadata for a set of users, applications, and registered oauth clients. Users can be created within a specific realm within the Administration console. Roles (permission types) can be defined at the realm level and you can also set up user role mappings to assign these permissions to specific users.
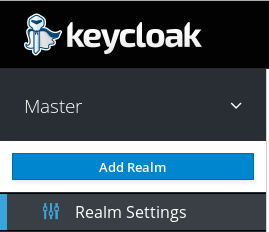
1) Create a Realm
First, create a new Realm by clicking on the Add Realm Button, located on the left side bar:
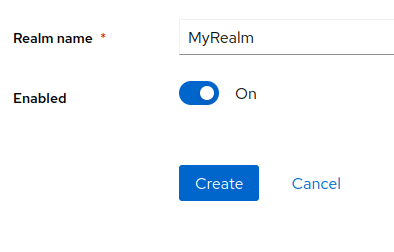
Next, enter the Realm Name, for example MyRealm and click on Create:
2) Create a Role
Then, we will define a Role. The Role will be used by your applications to define which users will be authorized to access the application. Click on the “Roles” left link and choose “Add Role“:
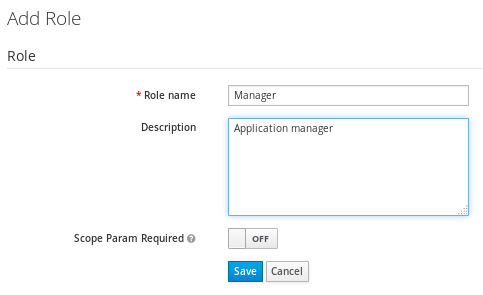
Your Realm now includes the Role “Manager”. Our application will allow only Users with this Role.
3) Create an User
So far we don’t have any User, besides the admin user. We will create another User for our application. Click on the “Users” left option and choose to Add a new User:
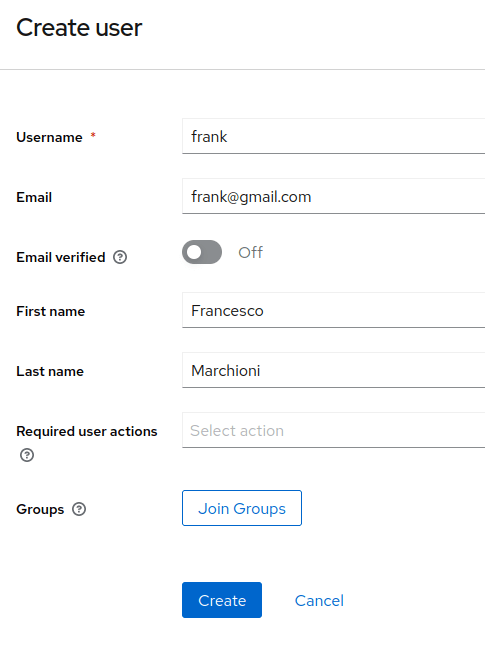
The User named “frank” will be added by clicking on Save. Now select the User from the list: we need to perform two actions on it.

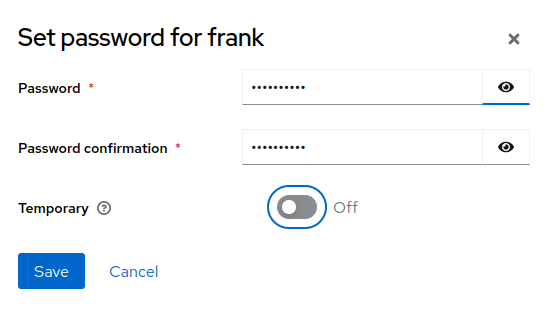
The first one will be setting a password for it so click on Credentials and set a new Password for the user:
4) Assign a Role to the User
Finally, we will include the User as part of the Manager Role. Click on Users | User details | Role Mappings Tab and assign the User to the Manager Role by selecting the Manager Role and clicking on Add selected:

5) Create a new Client
A KeyCloak Client is an application that will authenticate with KeyCloak Identity Server. Therefore, our next step will be to defining a new Client by clicking on the “Clients” link on the left:

Choose to Create client. The most important settings are the following ones:
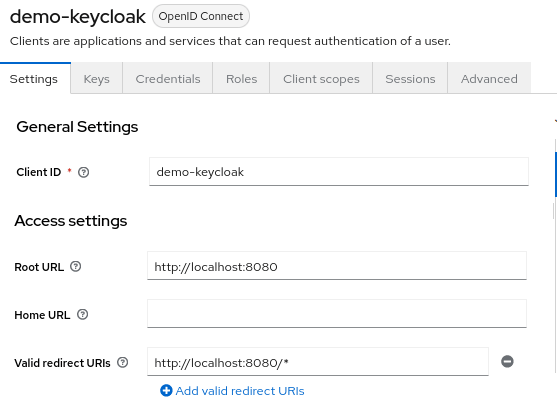
In the General Settings, configure:
- Client ID which specifies ID referenced in URI and tokens.
- Keycloak Client Root URL, which is the base URL of the Keycloak client application. It is typically used as a base URL for redirecting users to Keycloak for authentication, or for making API calls to the Keycloak server.
- Keycloak Client Valid Redirect URL, which is a URL that Keycloak server uses to redirect the user after successful authentication.
Then, in the Capability config, enable Client Authentication:
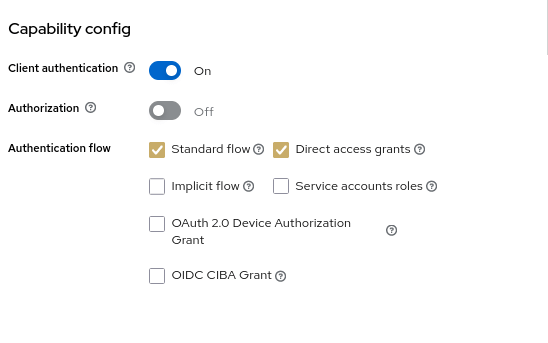
Next, click on Save.
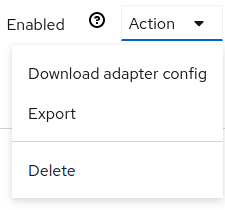
The last step is to export Keycloak OIDC details as a JSON String. You can do that from the Clients perspective, click on the Action | Download adaptor configs:
In the Download window, choose to generate a JSON OIDC code for your application:

Download the JSON or simply copy it in an editor, we will use it in a minute.
Installing the OIDC JSON file in your Applications
if you are using WIldFly 26 or newer, testing the application is quite simple as WildFly can authenticate against Keycloak OIDC natively. If you are running an older version of the application server, skip to the next section “Installing Keycloak adapter on WIldFly)
To authenticate against KeyCloak Realm, save the keycloak.json file as oidc.json in the WEB-INF folder of your application. For example:
src
└── main
    ├── java
    │   └── com
    │       └── mastertheboss
    │           └── servlet
    │               └── SecuredServlet.java
    └── webapp
        └── WEB-INF
            ├── oidc.json
            └── web.xml
Then, in the web.xml, specify as Authentication Method OIDC:
<login-config>
        <auth-method>OIDC</auth-method>
</login-config>
Finally, add a SecurityConstraint in your Web application which requires the Manager Role:
@WebServlet("/secured")
@ServletSecurity(httpMethodConstraints = { @HttpMethodConstraint(value = "GET", rolesAllowed = { "Manager" }) })
public class SecuredServlet extends HttpServlet {

    @Override
    protected void doGet(HttpServletRequest req, HttpServletResponse resp) throws ServletException, IOException {
        try (PrintWriter writer = resp.getWriter()) {
            writer.println("<html>");
            writer.println("  <head><title>Secured Servlet</title></head>");
            writer.println("  <body>");
            writer.println("    <h1>Secured Servlet</h1>");
            writer.println("    <p>");
            writer.print(" Current Principal '");
            Principal user = req.getUserPrincipal();
            writer.print(user != null ? user.getName() : "NO AUTHENTICATED USER");
            writer.print("'");
            writer.println("    </p>");
            writer.println("  </body>");
            writer.println("</html>");
        }
    }

}
You can deploy the application on WildFly with:
mvn install wildfly:deploy
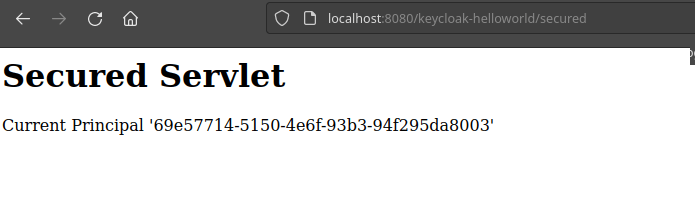
When you try to reach the /secured Servlet, you will be redirected to the KeyCloak authentication page. Upon successful authentication, you will be able to access the Secured Servlet, which prints the current Role:
Source code for this application: https://github.com/fmarchioni/mastertheboss/tree/master/keycloak/helloworld
Installing Keycloak adapter for WildFly (deprecated)
The second part of this tutorial, discusses how to run KeyCloak applications on older WildFly versions. To do that, we need to install an adapter for it. Follow these steps:
1) Unzip the Adapter into the directory where you have installed WildFly:
Unzip this file into the root directory of your Wildfly distribution.
2) Next execute the CLI script to install the adapter:
For WildFly 10:
$ cd bin
$ ./jboss-cli.sh --file=adapter-install-offline.cli
For WildFly 11 and above:
$ cd bin
$ ./jboss-cli.sh --file=adapter-elytron-install-offline.cli
This script will make the appropriate edits to the standalone/configuration/standalone.xml file of your app server distribution.
Great. Reload or Restart your server which now is Keycloak aware!
Securing applications with Keycloak
This paragraph of our Keycloak tutorial discusses how to secure applications. There are three options to authenticate your applications using Keycloak.
- The first option consists in adding the Keycloak JSON file within your Web application and specify in web.xml that we will be using KEYCLOAK Auth.
- The second option consists in configuring WildFly keycloak’s subsystem with the list of applications that will use KEYCLOAK Auth.
- The third option allows to download the CLI command to run on WildFly to allow Keycloak Authentication/Authorization for a specific deployment unit.
Keycloak security in the Web application
Create a Web application that exposes the “/hello” URL and include within the web.xml file a security-constraint bound to the “Manager” Role. Also include as authentication mechanism “KEYCLOAK” which is not a standard JEE authentication mechanism, hence it needs that you patched the application server as we have describer earlier:
<web-app xmlns="http://java.sun.com/xml/ns/javaee"
         xmlns:xsi="http://www.w3.org/2001/XMLSchema-instance"
         xsi:schemaLocation="http://java.sun.com/xml/ns/javaee http://java.sun.com/xml/ns/javaee/web-app_3_0.xsd"
         version="3.0">

    <module-name>basicauth</module-name>

    <security-constraint>
        <web-resource-collection>
            <url-pattern>/*</url-pattern>
        </web-resource-collection>
        <auth-constraint>
            <role-name>Manager</role-name>
        </auth-constraint>
    </security-constraint>

    <login-config>
        <auth-method>KEYCLOAK</auth-method>
        <realm-name>MyRealm</realm-name>
    </login-config>

    <security-role>
        <role-name>Manager</role-name>
    </security-role>
</web-app>
Next, we need to add, in the WEB-INF folder, is a keycloak.json with that contains the JSON descriptor we have just generated:
{
   "realm":"MyRealm",
   "auth-server-url":"http://localhost:8180/auth",
   "ssl-required":"external",
   "resource":"demo-keycloak",
   "credentials":{
      "secret":"86f1644f-b686-4011-8c05-31ca7245f94a"
   },
   "confidential-port":0
}
Save and deploy the application. If you try to access your application at localhost:8080/hello the Keycloak login authentication UI will prompt:
Enter your User’s credentials with the “Manager” Role and verify that you can access the pages contained in your application.
Plugging Keycloak security in the WildFly (XML)
This option has the advantage that can be applied without changing the content of your Web application. It requires accessing the XML Configuration of your WildFly Application Server.
From the Keycloak Clients Panel, select the Installation Tab and pickup in the Format Option “Keycloak OIDC JBoss Subsystem XML” as you can see from this picture:

Next, copy the XML template from the Installation page, and paste this into the standalone.xml file that resides in the standalone/configuration directory of the application server instance on which your application is deployed.
Open the standalone/configuration/standalone.xml file (or the one you use) and search for the following text:
<subsystem xmlns="urn:jboss:domain:keycloak:1.1"/>
Simply paste the XML in the subsystem and replace the secure-deployment name with the application name. You are done!
Plugging Keycloak security in the WildFly (CLI)
Finally, the last option which you can use, is available in the Format Option “Keycloak OIDC JBoss Subsystem CLI” as you can see from this picture:
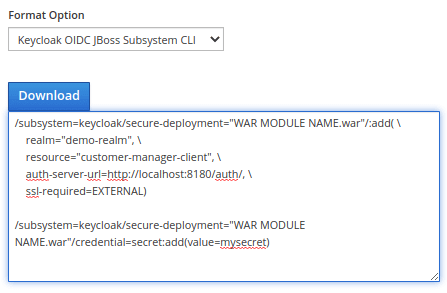
This option is the recommended choice. A common use case for it is creating a MicroService with WildFly Bootable Jar, where your server configuration includes custom CLI commands to run at start.
Found the article helpful? if so please follow us on Socials


