Welcome to this tutorial on Apache Camel K, a new open-source integration platform that enables you to build, deploy and manage cloud-native integration patterns effortlessly. Whether you’re a seasoned developer or just starting your journey, this tutorial will guide you through the basics of Camel K and teach you how to harness its power to create efficient, scalable and robust integration solutions.
What is Camel K ?
The idea of Camel K is bare simple: let developers use the Enterprise Integration Patterns (EIP) natively on Kubernetes, expressing them using the powerful Camel DSL. As Camel K requires using Kubernetes we will test in with minikube (it will work just the same with OpenShift).
The procedure for installing Minikube is detailed at: https://minikube.sigs.k8s.io/docs/start/
As first step, start minikube:
minikube start
With Minikube running, the next step is to deploy the registry, which is an addon maintained by Google.
minikube addons enable registry
To start using Camel K you need the “kamel” shell tool, that is available into the release page for the latest version of the camel-k-client tool: https://github.com/apache/camel-k/releases
Download and uncompress the archive. and put the binary file “kamel” in your system’s path. For example, in /usr/bin.
Now, you can proceed with the installation:
kamel install
When the installation is completed, you should be to see the camel-k operator in your Kubernetes’ pods:
kubectl get pods

NAME                               READY   STATUS    RESTARTS   AGE
camel-k-operator-789b74c76-4q6d6   1/1     Running   0          3m48s
There are plenty of available examples in https://github.com/apache/camel-k/releases . For example, let’s give a run to Sample.java
import org.apache.camel.builder.RouteBuilder;

public class Sample extends RouteBuilder {
  @Override
  public void configure() throws Exception {
    from("timer:tick").log("Hello Camel K!");
  }
}
In order to run this sample Camel Route, you can use the “run” option. We will also add the “–dev” flag to allow live reload of code:
$ kamel run Sample.java --dev The Camel Route will soon start:
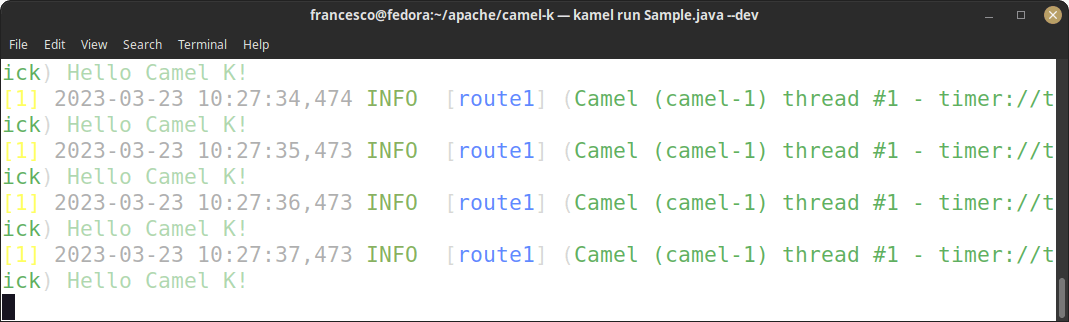
Notice you don’t need to specify any dependency specification in the folder, Camel K will figure it out, and inject it during the build. So all you need is to JUST write your application.
Also, as we are running in dev mode, that allow users to create integration incrementally and with immediate “buildless” redeploys. For example, change just the log message in the sample class:
public void configure() throws Exception {
  from("timer:tick").log("Hello Camel K just changed!");
}
The application will be updated automatically as you save the code:
[1] 2021-01-20 08:43:49,811 INFO [route1] (Camel (camel-1) thread #0 - timer://tick) Hello Camel K just changed!
We can be even more adventurous, we will use a property file to define the content of the message.Let’s edit a file named sample.properties to have this content:
message=Hello World from Camel K!
And change the Sample.java class accordingly:
import org.apache.camel.builder.RouteBuilder;

public class Sample extends RouteBuilder {
  @Override
  public void configure() throws Exception {
    from("timer:tick").log("{{message}}");
  }
}
In order to use the external property file, just add the option –property-file at start up:
$ kamel run Sample.java --property-file sample.properties --dev
And here’s back your original log message:
[1] 2021-01-20 08:48:29,496 INFO [route1] (Camel (camel-1) thread #0 - timer://tick) Hello World from Camel K!
Languages support in Camel-K
Camel-K is not just for java. Several other languages are supported, such as:
- Groovy (currently the preferred language for writing Camel K integration code)
- Kotlin
- Java
- XML
- JavaScript
Just have a look at the hello.groovy example:
from("timer:tick?period=3s")
   .setBody().constant("Hello from Camel K in Groovy!!!")
     .to("log:message")
As you can see the code is even more concise. To run the Groovy example, you can use the same command line option:
$ kamel run hello.groovy --dev
And that’s it:
INFO [message] (Camel (camel-1) thread #0 - timer://tick) Exchange[ExchangePattern: InOnly, BodyType: String, Body: Hello from Camel K in Groovy!!!]
Conclusion
Wee have learned how to build, deploy and manage cloud-native applications with Camel-K. You now have a better understanding of the features, benefits and use cases of Camel K and can apply this knowledge to develop efficient and scalable integration solutions. Check out the Camel-K documentation to learn more: https://camel.apache.org/camel-k/latest/index.html
Found the article helpful? if so please follow us on Socials


