RabbitMQ is lightweight broker and easy to on premises and in the cloud. It supports multiple messaging protocols. RabbitMQ can be deployed in distributed and federated configurations to meet high-scale, high-availability requirements. In this tutorial we will learn how we can use Spring Boot to create and consume JMS messages using RabbitMQ broker.Start
Starting RabbitMQ
Before starting our project, we will need to start a RabbitMQ server. The simplest way to get started is to launch a Docker image of it:
docker run --rm -p 15672:15672 -p 5672:5672 rabbitmq:3-management
Then, verify that you can access Rabbit MQ Console through the default address localhost:15672 :
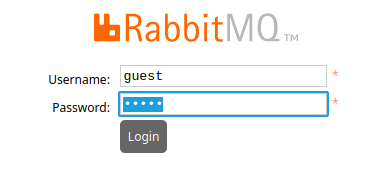
The default username and password is “guest/guest”. That will take you through the main Administration Console of RabbitMQ:
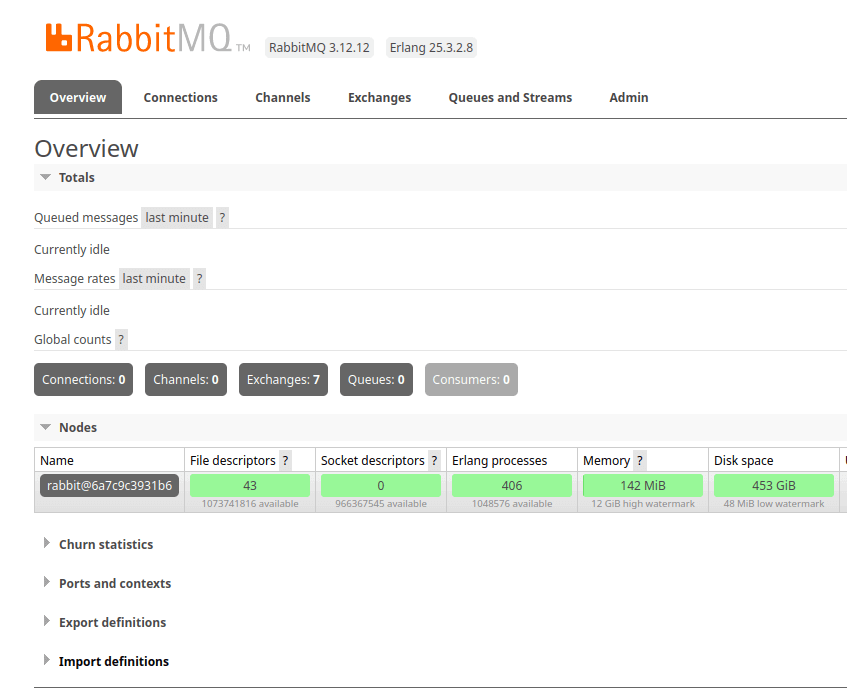
Great! RabbitMQ is up and running. We will now code a simple Spring Boot application that consumes and receives message with the RabbitMQ Server.
Creating the Spring Boot Project
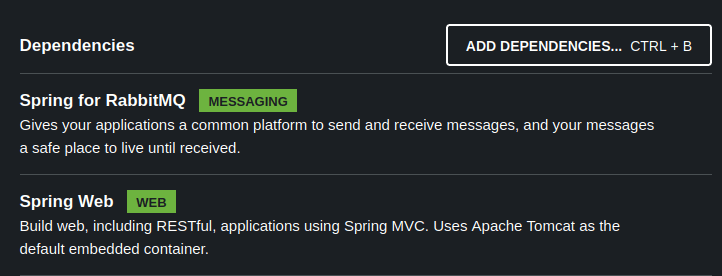
In order to start, we will create a sample consumer and producer project. The consumer will use RabbitMQ dependencies, the producer will also use the web dependencies to expose a rest controller to send messages.
Therefore, add the following dependencies to your project:
Let’s finish the configuration by adding the following properties into the resources/application.properties file:
spring.rabbitmq.host=localhost
spring.rabbitmq.port=5672
spring.rabbitmq.username=guest
spring.rabbitmq.password=guest

rabbitmq.queue.name=demoQueue
rabbitmq.exchange.name=demoQueue_exchange
rabbitmq.routing.key=demoQueue_routing_key
rabbitmq.queue.name=demoQueue : This property specifies the name of the queue that the application will use to send and receive messages.
rabbitmq.exchange.name=demoQueue_exchange : This property specifies the name of the exchange that the application will use to publish messages. An exchange is a central message routing point in RabbitMQ. It is responsible for routing messages to queues based on a routing key.
rabbitmq.routing.key=demoQueue_routing_key : This property specifies the routing key that the application will use to route messages to the queue. The routing key is a string that is used by the exchange to determine which queue to send a message to.
To get our configuration injected, start adding the following RabbitMQConfig Class to your Spring Boot project:
import org.springframework.amqp.core.*;
import org.springframework.beans.factory.annotation.Value;
import org.springframework.context.annotation.Bean;
import org.springframework.context.annotation.Configuration;

@Configuration
public class RabbitMQConfig {

    @Value("${rabbitmq.queue.name}")
    private String queue;

    @Value("${rabbitmq.exchange.name}")
    private String exchange;

    @Value("${rabbitmq.routing.key}")
    private String routingKey;

    // spring bean for rabbitmq queue
    @Bean
    public Queue queue(){
        return new Queue(queue);
    }

    // spring bean for rabbitmq exchange
    @Bean
    public TopicExchange exchange(){
        return new TopicExchange(exchange);
    }

    // binding between queue and exchange using routing key
    @Bean
    public Binding binding(){
        return BindingBuilder
                .bind(queue())
                .to(exchange())
                .with(routingKey);
    }

}
The Configuration is self-descriptive. Also, consider that Spring boot autoconfiguration will also provide the Beans ConnectionFactory, RabbitTemplate and RabbitAdmin on top of your configuration.
Adding the RabbitMQ Producers and Consumers
The core part of our Spring Boot – RabbitMQ example will be coding the Producers and Consumers that will send messages to the Queue demoQueue .
Firstly, we will add the Publisher Service Class which uses RabbitTemplate to send a simple text message:
import org.slf4j.Logger;
import org.slf4j.LoggerFactory;
import org.springframework.amqp.rabbit.core.RabbitTemplate;
import org.springframework.beans.factory.annotation.Value;
import org.springframework.stereotype.Service;

@Service
public class Publisher {

    @Value("${rabbitmq.exchange.name}")
    private String exchange;

    @Value("${rabbitmq.routing.key}")
    private String routingKey;

    private static final Logger LOGGER = LoggerFactory.getLogger(Publisher.class);

    private RabbitTemplate rabbitTemplate;

    public Publisher(RabbitTemplate rabbitTemplate) {
        this.rabbitTemplate = rabbitTemplate;
    }

    public void sendMessage(String message){
        LOGGER.info(String.format("Message sent -> %s", message));
        rabbitTemplate.convertAndSend(exchange, routingKey, message);
    }
}
The RabbitTemplate class relies upon the Spring AMQP framework, which provides a consistent and easy-to-use API for interacting with RabbitMQ. It automatically handles the underlying details of creating and managing connections to RabbitMQ, as well as the intricacies of the AMQP protocol.
Then, let’s code the RabbitMQ Consumer:
import org.slf4j.Logger;
import org.slf4j.LoggerFactory;
import org.springframework.amqp.rabbit.annotation.RabbitListener;
import org.springframework.stereotype.Service;

@Service
public class Consumer {

    private static final Logger LOGGER = LoggerFactory.getLogger(Consumer.class);

    @RabbitListener(queues = {"${rabbitmq.queue.name}"})
    public void consume(String message){
        System.out.println(String.format("Received message -> %s", message));
    }
}
The org.springframework.amqp.rabbit.annotation.RabbitListener annotation mark methods in Spring applications as RabbitMQ message listeners. This is a callback method triggered when messages are received on the specified queues or bindings.
This annotation is conceptually equivalent to the onMessage method of JMS Message Driven Beans.
Adding a basic Controller
Finally, we will add a simple Spring Boot Controller Class to trigger new messages:
import org.springframework.beans.factory.annotation.Autowired;
import org.springframework.web.bind.annotation.RequestMapping;
import org.springframework.web.bind.annotation.RequestParam;
import org.springframework.web.bind.annotation.RestController;


@RestController
public class WebController {
  @Autowired Publisher publisher;

  @RequestMapping("/send")
  public String sendMsg(@RequestParam("msg") String msg) {
    publisher.sendMessage(msg);
    return "Done";
  }
}
Let’s test our application. firstly, build and run it:
mvn install spring-boot:run
Then, send a message to the Controller:
curl http://localhost:8080/send?msg=Hello
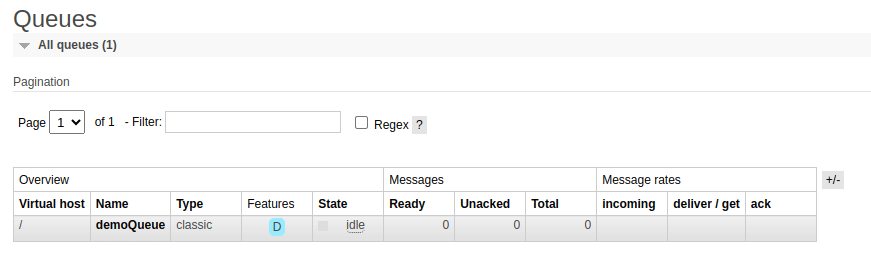
You can verify from RabbitMQ Console the status of our demoQueue:
Conclusion
In conclusion, this tutorial has shown the powerful combination of RabbitMQ and Spring Boot. By integrating these technologies, we’ve explored how to optimize message queuing, enhance system reliability, and streamline the development of robust, event-driven applications. Whether you’re a seasoned developer or just starting out, the knowledge gained here equips you to leverage RabbitMQ and Spring Boot effectively. As you continue your journey, remember the potential this combination holds for elevating your application development endeavors.
Found the article helpful? if so please follow us on Socials


