In this tutorial, you will learn how to secure a Spring Boot application using Keycloak and JWT tokens. We will walk through how to quickly set up a Keycloak server and configure a Spring Boot application to authenticate and authorize users via Keycloak. This comprehensive guide is ideal for developers looking to integrate robust, enterprise-grade authentication into their Spring Boot applications.
Prerequisites
Before starting, ensure you have the following installed:
- Java 17 or later
- Maven 3.8+
- Docker (optional, if you prefer running Keycloak in a container)
- Keycloak 22 or later (self-hosted or Docker image)
- Basic understanding of Spring Boot and OAuth2 concepts
Step 1: Setting Up Keycloak
To run this example, we will configure a local Keycloak server with a custom Realm called “ApplicationRealm”.
1.1 Download and Install Keycloak
You can download Keycloak from the official Keycloak website or use Docker to run it quickly:
docker run -p 8080:8080 -e KEYCLOAK_ADMIN=admin -e KEYCLOAK_ADMIN_PASSWORD=admin quay.io/keycloak/keycloak:latest start-dev
In this example, we will use the following Keycloak Configuration:
- Admin credentials:
admin/admin - Application Realm:
ApplicationRealm - Client ID:
my-client - User:
user1/123456(with role “admin”)
To learn more about using Keycloak with Docker check this tutorial: Keycloak Using Docker and Docker Compose (2025 Edition)
1.2 Configure Keycloak via CLI
You can automate the configuration using the Keycloak Admin CLI (kcadm.sh):
#Authenticate with the Admin Server
./kcadm.sh config credentials --server http://localhost:8080 --realm master --user admin --password admin

#Create Realm ApplicationRealm
./kcadm.sh create realms -s realm=ApplicationRealm -s enabled=true -o

#Create User user1
./kcadm.sh create users -r ApplicationRealm \
  -s username=user1 \
  -s enabled=true \
  -s email="[email protected]" \
  -s emailVerified=true \
  -s firstName=Joe \
  -s lastName=Doe


#Set user1 password
./kcadm.sh set-password -r ApplicationRealm --username user1 --new-password 123456

#Create Client
./kcadm.sh create clients -r ApplicationRealm -s clientId=my-client -s bearerOnly="false" -s "redirectUris=[\"http://localhost:8180/*\"]" -s enabled=true -s directAccessGrantsEnabled=true -s clientAuthenticatorType=client-secret -s secret=mysecret

#Create Role customer-manager
./kcadm.sh create roles -r ApplicationRealm -s name=admin

#Assign Role to user1
./kcadm.sh add-roles --uusername user1 --rolename admin -r ApplicationRealm
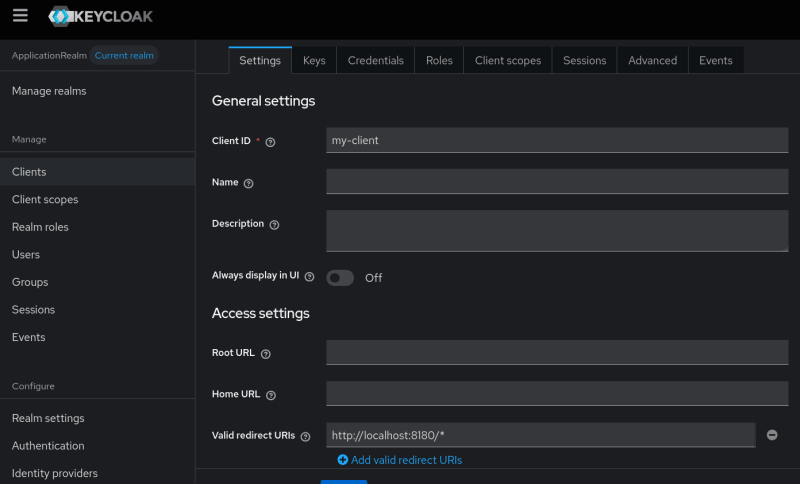
This script will configure your realm, user, client, and roles automatically, saving a lot of time for future deployments. Check that your Keycloak Client and Realms are up and running:
Step 2: Configuring the Spring Boot Application
Now let’s set up our Spring Boot application to use Keycloak for authentication.
2.1 Add Dependencies
Add the following dependencies to your pom.xml:
<dependency>
	<groupId>org.springframework.boot</groupId>
	<artifactId>spring-boot-starter-oauth2-resource-server</artifactId>
</dependency>
<dependency>
	<groupId>org.springframework.boot</groupId>
	<artifactId>spring-boot-starter-security</artifactId>
</dependency>
<dependency>
	<groupId>org.springframework.boot</groupId>
	<artifactId>spring-boot-starter-web</artifactId>
</dependency>
Make sure you’re using the latest Spring Boot version as parent:
<parent>
	<groupId>org.springframework.boot</groupId>
	<artifactId>spring-boot-starter-parent</artifactId>
	<version>3.4.5</version>
	<relativePath/> <!-- lookup parent from repository -->
</parent
Step 3: Coding the Spring Boot Application
Let’s create a basic REST API with secured endpoints.
3.1 Create the Controller
@RestController
@RequestMapping("/api")
public class ControllerHello{

    @GetMapping("/hello")
    public ResponseEntity<String> sayHello() {
        return ResponseEntity.ok("Hello");
    }

    @GetMapping("/admin")
    public ResponseEntity<String> sayHelloToAdmin() {
        return ResponseEntity.ok("Hello Admin");
    }

    @GetMapping("/user")
    public ResponseEntity<String> sayHelloToUser() {
        return ResponseEntity.ok("Hello User");
    }
}
This controller simply defines three endpoints: one public (/hello), and two secured (/admin and /user).
3.2 Set Up the Security Configuration
Here is the SecurityFilterChain which authorizes the REST Endpoints:
@RequiredArgsConstructor
@Configuration
@EnableWebSecurity
public class SecurityConfig {

    public static final String ADMIN = "admin";
    public static final String USER = "user";
    private final JwtConverter jwtConverter;
    @Bean
    public SecurityFilterChain securityFilterChain(HttpSecurity http) throws Exception {
        http.authorizeHttpRequests((authz) ->
                authz.requestMatchers(HttpMethod.GET, "/api/hello").permitAll()
                .requestMatchers(HttpMethod.GET, "/api/admin/**").hasRole(ADMIN)
                .requestMatchers(HttpMethod.GET, "/api/user/**").hasRole(USER).requestMatchers(HttpMethod.GET,
                                "/api/admin-and-user/**").hasAnyRole(ADMIN,USER)
                .anyRequest().authenticated());

        http.sessionManagement(sess -> sess.sessionCreationPolicy(
                SessionCreationPolicy.STATELESS));
        http.oauth2ResourceServer(oauth2 -> oauth2.jwt(jwt -> jwt.jwtAuthenticationConverter(jwtConverter)));

        return http.build();
    }

}
To complete the application, we also need a Class JwtConverter which implements Converter . You can find the full source code at the end of this article.
Step 4: Configuring Keycloak Integration
Now configure your application.properties to point to the Keycloak server:
server.port=8180

spring.application.name=KeycloakSpringBootApplication

# Security Configuration
# Specifies the URI of the token issuer (Keycloak realm) for validating JWT tokens.
spring.security.oauth2.resourceserver.jwt.issuer-uri=http://localhost:8080/realms/ApplicationRealm

# Specifies the URI to retrieve the JSON Web Key Set (JWKS) from the issuer, used to verify the JWT signature.
spring.security.oauth2.resourceserver.jwt.jwk-set-uri=${spring.security.oauth2.resourceserver.jwt.issuer-uri}/protocol/openid-connect/certs

# JWT Configuration
# Defines the resource ID that the JWT auth converter should validate against.
jwt.auth.converter.resource-id=my-client

# Specifies the attribute in the JWT that contains the principal (user identifier).
jwt.auth.converter.principal-attribute=principal_username


# Logging Configuration
logging.level.org.springframework.security=DEBUG
Note: Adjust the principal-attribute depending on what claim you want to use (like sub, email, or preferred_username).
Step 5: Testing the Application
5.1 Start Your Spring Boot Application
Use Maven to build and run the application:
mvn clean install spring-boot:runThe application will be available at http://localhost:8180.
5.2 Authenticate and Call the API
Here’s a sample Java client to retrieve a token and access a secured endpoint:
public class SimplePostRequestSecret {

    public static void main(String[] args) {
        String tokenUrl = "http://localhost:8080/realms/ApplicationRealm/protocol/openid-connect/token";
        String apiUrl = "http://localhost:8180/api/admin";

        String grantType = "password";
        String clientId = "my-client";
        String clientSecret = "mysecret"; // Keycloak client secret
        String username = "user1";  // only user1 authorized
        String password = "123456";

        try {
            // Prepare form data
            Map<Object, Object> data = new HashMap<>();
            data.put("grant_type", grantType);
            data.put("client_id", clientId);
            data.put("client_secret", clientSecret); // Add client secret to the form data
            data.put("username", username);
            data.put("password", password);

            String form = data.entrySet()
                    .stream()
                    .map(entry -> entry.getKey() + "=" + URLEncoder.encode(entry.getValue().toString(), StandardCharsets.UTF_8))
                    .collect(Collectors.joining("&"));

            // Create HttpClient
            HttpClient client = HttpClient.newHttpClient();

            // Create HttpRequest for POST to get the token
            HttpRequest tokenRequest = HttpRequest.newBuilder()
                    .uri(URI.create(tokenUrl))
                    .header("Content-Type", "application/x-www-form-urlencoded")
                    .POST(HttpRequest.BodyPublishers.ofString(form))
                    .build();

            // Send the POST request
            HttpResponse<String> tokenResponse = client.send(tokenRequest, HttpResponse.BodyHandlers.ofString());
            System.out.println("POST Response Code :: " + tokenResponse.statusCode());

            if (tokenResponse.statusCode() == 200) { // success
                String responseBody = tokenResponse.body();
                System.out.println("Response Body: " + responseBody);

                // Parse JSON response
                ObjectMapper mapper = new ObjectMapper();
                JsonNode rootNode = mapper.readTree(responseBody);
                JsonNode accessTokenNode = rootNode.path("access_token");
                String token = accessTokenNode.asText();

                if (!accessTokenNode.isMissingNode()) {
                    System.out.println("Access Token: " + token);

                    // Create HttpRequest for GET to access the secured endpoint
                    HttpRequest apiRequest = HttpRequest.newBuilder()
                            .uri(URI.create(apiUrl))
                            .header("Authorization", "Bearer " + token)
                            .GET()
                            .build();

                    // Send the GET request
                    HttpResponse<String> apiResponse = client.send(apiRequest, HttpResponse.BodyHandlers.ofString());
                    System.out.println("GET Response Code :: " + apiResponse.statusCode());

                    if (apiResponse.statusCode() == 200) { // success
                        System.out.println("GET Response: " + apiResponse.body());
                    } else {
                        System.out.println("GET request not worked");
                        System.out.println("Error Response: " + apiResponse.body());
                    }
                } else {
                    System.out.println("Response: " + responseBody);
                }
            } else {
                System.out.println("POST request not worked");
                System.out.println("Error Response: " + tokenResponse.body());
            }
        } catch (Exception e) {
            e.printStackTrace();
        }
    }
}
This HTTP client will:
- Authenticate the user via Keycloak and retrieve a JWT token.
- Access the
/api/adminendpoint using the token.
You can also use Postman or cURL to test the endpoints manually.
Conclusion
In this guide, you learned how to:
- Set up a Keycloak server.
- Secure a Spring Boot REST API using JWT tokens and OAuth2.
- Configure roles and permissions inside Keycloak.
- Protect different API endpoints based on user roles.
Integrating Keycloak with Spring Boot provides a powerful and flexible way to manage authentication and authorization for your applications. Whether for internal tools or production-grade microservices, this setup can easily scale to meet your security needs.
Source code: https://github.com/fmarchioni/mastertheboss/tree/master/spring/keycloak